
Picking up and playing the guitar is something many people dream about. However, a number of these folks will never actually get around to doing it. “It’s too hard” and “I don’t have the time” are two common excuses for not playing the guitar.
While we understand learning any instrument is time-consuming, putting the time in to learn to play the guitar is something no one will ever regret.
Yes, learning the guitar can be challenging but it is also exciting and a lot of fun! But, one factor that many guitarists don’t consider is the cost of new strings. Buying the guitar can be a pretty expensive decision.
However, most models will come with strings included. But, over time, these strings begin to wear and will start to sound dull. This is when it’s time to change the strings.
It’s pretty easy to know when it’s time to change your strings. They become discolored and the guitar just won’t sound as bright and good anymore. If so, it’s time to browse your local music store or online and purchase a new set of guitar strings.
If you’re new to guitar paling, whether it’s a steel string or nylon string guitar, you’re probably wondering, and worried, about how much a new set of strings will set you back. Well, you’re in the right place!
In today’s article, we will be covering the general prices of new acoustic guitar strings. We will also be looking at the type of strings and gauge sizes that you should consider.
So, put down that guitar for a few moments as we help you budget a new set of acoustic guitar strings so your guitar’s sound can return to its former glory.
Restringing Your Acoustic Guitar
The first step when restringing your acoustic guitar is to remove the old strings. This step requires great care and patience.
Firstly, you should place your guitar flat on its back. We recommend putting a towel or blanket underneath the guitar to prevent it from scratching the surface below.
Then, grab another towel or blanket and place this under the guitar’s headstock for extra security and protection.
Next, you need to loosen the strings one at a time. To do this, start with the high E string (the thinnest). Twist the tuning peg until the string becomes looser. From this point, you can either cut the string with a pair of pliers or simply unwind it from the headstock completely.
Once you have removed the string from the headstock, you can pop up the fixing pegs on the body of the guitar and then remove the ball end of the string.
You can do this one string at a time and restring each one individually or take each string off if you want to clean the guitar’s fretboard.
If you have a string winder, you may have a fixing peg tool that is attached to the guitar’s winder. If this isn’t the case, unwinding the pegs can be a little stubborn on removal.
Always take care when removing the strings and protect your guitar. The number of guitarists who have damaged their guitars when restringing is vast. So, don’t be one of them. Take the necessary precautions and take your time.
Installing The New Acoustic Guitar Strings
The next step is to install new strings onto your guitar. Don’t worry we will guide you through how to choose your new strings below.
Once you have your new strings in hand, it’s time to attach them to your guitar. Many new and even experienced guitarists dread the restringing process but there is no need to. It’s simply part and parcel of being a guitarist and something every guitar player should learn how to do.
The process is pretty self-explanatory. However, you should always inspect the orientation of your guitar before installing new strings. For instance, think about whether you are a left-handed guitar player. If so, you need to make sure you do not put the strings on upside down.
You should also consider where to start installing your new strings. This can be either from the outside inwards (start with the high E to the low E strings).
Many guitarists do this differently but a popular method is to begin with the high E, then install the low E, followed by the B and A, and finish with the G and D strings.
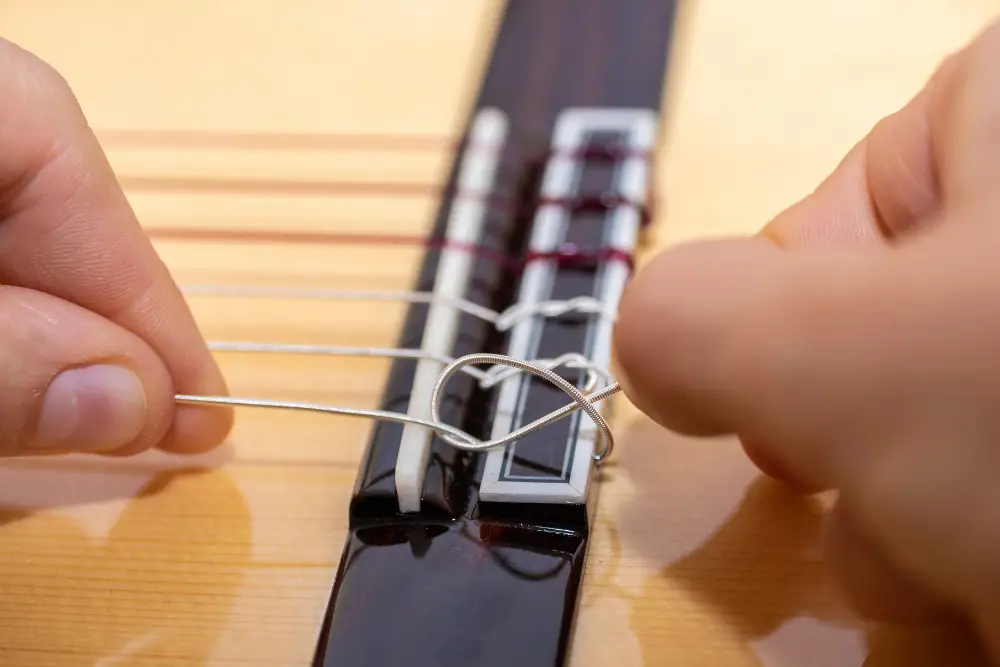
You should start by inserting the ball end of your new acoustic string into the fixing peg hole. These peg holes come with slots on one side for the strings to neatly fit and sit within. This helps them stay secured and fixed without jumping out.
When you place the ball end of the string in this fixing peg hole, ensure that the ball of the string is below the end of the fixing peg. Then, ensure the peg is firmly set in place.
The next step is to insert the opposite end of the string into the correct and appropriate tuner hole. This will be on the headstock of the guitar. Once the string is in the right tuning peg hole, you need to start tightening anti-clockwise.
This will ensure that the strings are property guided onto the inside face of the tuners. Many guitarists can get this stage wrong as one string will tune one way while the next goes the opposite.
So, make sure each string is tightened in the same manner and they are guided on the inside of the tuning peg.
Each string will be attached to its closest tuners. And, these will work their way up based on the gauge of the particular string.
Make sure that you leave enough slack on each string so that they can wrap around the tuning pegs. When you first tighten the tuning pegs, do not tune to concert pitch (E-A-D-G-B-E). Instead, simply check that they are firmly in place and not overly tight. And do this for all six strings.
Be careful with the thinnest strings (B and E) as these are not as strong as the others. Therefore, they are more susceptible to snapping if you tighten them too quickly or do not leave enough slack. However, if there is sufficient slack, there shouldn’t be a problem.
Tuning Your New Acoustic Guitar Strings
Once all of the new strings have been installed on your acoustic guitar, it’s time to begin tuning each one. For new guitar players, this can be another daunting step.
However, there are a number of tools to help you tune your guitar at first such as clip-on tuners and mobile apps that help you tune your guitar properly. We highly recommend beginner guitar players use these tuners at first but to learn how to tune by ear as well.
You can also tune your guitar by referencing it to another instrument. Simply tune the low E string to the E of another instrument such as a piano.
However, if you do not have access to another instrument, you can simply type in “the sound of a low E string on an acoustic guitar” on the internet and you can match up your guitar’s E string with this sound.
For you to produce and play accurate and pleasant sounding chords, you will need to tune each string in relation to another. If you want to play anything more than isolated single notes, then the tuning of each string is critical.
Luckily, this step is pretty simple. For standard tuning, the strings should be tuned to E-A-D-G-B-E (lowest to highest- thickest to thinnest). So, the A string should be tuned to an A note. If your low E string is tuned correctly, you can tune the A string by playing the fifth fret of the low E string.
Simply turn the A string’s tuning peg tighter or looser until it matches the note of that fifth fret. If the note is lower than that fifth fret of the E string, you need to tighten the tuning peg. If it is higher, you need to loosen it.
You can then repeat this process for all the strings apart from the B string. Instead, play the fourth fret of the G string and match the B string with this note. And, when you want to tune the high E string, simply play the fifth fret of the B string and match this note up again.
This may take a little time to get used to but the more you tune your guitar, the quicker and easier it will become. The easiest method is to tune each string with an electronic or clip-on tuner but this method should be learned for when these devices are not available.
Purchasing New Acoustic Guitar Strings
Before you restring and tune your acoustic guitar’s new strings, you will need to buy a new set. The first thing a music store employee or a website will ask you is what string gauge you want. The gauge refers to the thickness of the strings and is measured in thousands of an inch.
All guitarists are unique and some prefer thicker gauges while some adore the thinnest. This is something you can only come to understand after a little time playing the guitar and trying out different gauge strings.
When we refer to different gauges of strings, either the high E and low E are used or it’s just the high E. For instance, a set of light acoustic guitar strings that have a high E of .11 thousand of an inch and a low E of .52 thousand of an inch will be referred to as a set of 11 to 52s. They can also be known as a set of 11s.
Below are the set of gauges acoustic guitar strings are usually found in:
Strings
E (high) – Extra Lights 10 to 50’ (-10), Light 11 to 52’ (.11), Medium Light 12 to 54’ (.12), Medium 13 to 56’ (.13)
B – Extra Lights 10 to 50’ (.14), Light 11 to 52’ (.15), Medium Light 12 to 54’ (.16), Medium 13 to 56’ (.17)
G – Extra Lights 10 to 50’ (.22), Light 11 to 52’ (.24), Medium Light 12 to 54’ (.26), Medium 13 to 56’ (.28)
D – Extra Lights 10 to 50’ (.28), Light 11 to 52’ (.30), Medium Light 12 to 54’ (.32), Medium 13 to 56’ (.34)
A – Extra Lights 10 to 50’ (.39), Light 11 to 52’ (.42), Medium Light 12 to 54’ (.44), Medium 13 to 56’ (.36)
E (low) – Extra Lights 10 to 50’ (.50), Light 11 to 52’ (.52), Medium Light 12 to 54’ (.54), Medium 13 to 56’ (.56)
These string gauges are based on the highly popular Ernie Ball 80/20 bronze acoustic guitar strings. However, there are numerous variations on these gauges. In general, the string manufacturer and range of strings they sell determine the gauge of guitar strings on offer.
So, What String Gauges Should You Use?
The string gauge tends to determine the tone and playability of the instrument. So, the lighter the strings are, the easier they will be to press down and play. They will also be easier to bend for certain notes and the action can be set lower for easier playability.
Thicker gauge strings typically have a larger amount of tension because of their increased mass. This makes them harder to play but this is offset by a warmer, fuller tone most of the time.
If you’re relatively new to the guitar, or even a complete beginner, we recommend using lighter string gauges such as 11s or 10s.
For beginner guitarists, your hands will not be used to the roughness guitar strings can exude on the skin. Therefore, thicker strings could cause more blisters and be more uncomfortable to play.
As your hand strengthens and your guitar ability develops, you can start using 12s or 13s. But, don’t think it’s as simple as “the more experienced a guitarist is, the thicker gauge string they will use” because this isn’t the case.
It always comes down to personal preference and what helps you play with comfort and to the best of your ability.

Frequently Asked Questions
How Much To Restring An Acoustic Guitar?
Now that we have discussed how to restring your guitar, tune it, and what gauge strings to consider, we should get to the real reason why you’re here – to find out how much you need to spend on restringing your acoustic guitar.
To begin, we recommend that you visit your local music store and ask for some prices on new strings. Some stores offer to restring your guitar themselves so you don’t have to go through the whole process yourself.
If your local store offers this service, you could be looking to spend anywhere from $20 to $60. This includes the cost of your new set of strings. However, this can vary from one store to another and this is just an estimate.
Always confirm what the service they provide is first. If restringing the guitar costs too much, you could save a lot of money by doing it yourself.
Always be specific about what you expect to pay for. This can be just a new set of strings or a new set of strings combined with a restringing service. Go into the store with a budget in mind. Do not accept a price that you can not or do not want to afford.
If a music store offers a restringing service, this will usually include a nut and saddle adjustment as well as fingerboard cleaning. Over time, dead skin from your fingers can start to build up on your guitar’s frets and this will need to be cleaned off.
While this isn’t the most pleasant of jobs, it is a necessary part of guitar maintenance.
While this service isn’t quite a complete setup, this maintenance can be extremely beneficial, especially if your guitar hasn’t been used extensively in recent times.
You may be surprised what a few tweaks here and there can do when you pick the guitar up next. A professional service can make it more playable and easier on the fingers.
What Is The Cost Of Restringing Your Acoustic Guitar With A Setup?
The cost of a new set of strings alone can cost anywhere from $5 up to $60 depending on the quality and brand of guitar strings. For a full setup, you can expect this price to reach up to, and beyond, $120 in some stores.
Even for experienced guitarists, a setup from time to time can be very beneficial. Guitars can become affected by temperature changes as the seasons go from one to another. Humidity can affect the playability and tone of many acoustic guitars as the wood can warp in certain ways.
And, of course, the more you play your acoustic guitar, the more regularly it will require servicing. If you do not maintain your guitar properly, its playability, tone, and intonation can take a significant hit.
Basic maintenance is a fundamental skill that every guitarist should learn. While you can also learn to perform more complicated tasks such as fret dressing and truss rod adjustments, you can seek the help of a professional.
Although this will cost you more money, there is less chance of your guitar getting damaged.
We encourage every guitarist to learn basic guitar setups and maintenance. It may not sound like fun but when it’s an instrument you cherish and adore, you will learn to enjoy maintaining your guitar and keeping it in tip-top shape for as long as possible.
Of course, this depends on how much time you want to dedicate to your instrument. Some prefer to solely play their guitar and leave technicians to handle the maintenance side of things which is completely fine. Again, it’s a matter of personal preference.
If you want to set up your acoustic guitar properly and restring it, some additional services may include:
- Intonation adjustments
- Action adjustments such as with the nut height and saddle
- Truss rod adjustments
- Fretboard cleaning and conditioning
- Fret leveling and dressing (this is not always included)
Of course, your acoustic guitar may not require all of these services so always inspect your guitar to see if it’s worth the extra work and money on such maintenance. If you play your acoustic regularly, fret leveling may be required.
This is when the top of the fretboard wires are aligned to become level with each other. This is achieved by filing down any raised frets. Over time, these fret wires can become worn as the guitar strings are pressed against the neck.
How Much Is It To Restring An Electric Guitar?
The cost of electric and acoustic guitar strings is pretty similar. If you intend to restring an electric guitar by yourself, you should be looking at a price of $5 to $15. However, some strings are considerably more expensive and you could be looking at a cost of $60 and upwards.
In Summary
As you can see, the cost of restringing an acoustic guitar can depend on the quality of the strings you buy and whether you include a professional service at the same time. It’s usually worth investing some money into the maintenance of your guitar if you play it regularly.
But, if you only play it now and again, the strings will not wear so quickly and maintenance will not be required as often. And, the good news is that this will save you money over time.

Through this blog I hope to help and encourage others who have just started, or are on their own guitar playing journey. This blog is the ultimate guide to playing guitar, from the best guitars to purchase, to the easiest rock songs to play.
- 15 Must Have Guitar Accessories - January 7, 2022
- 5 Best Amp Stands For Improving Volume And Sound - January 7, 2022
- The 5 Best Locking Tuners For Fender Stratocasters - January 7, 2022